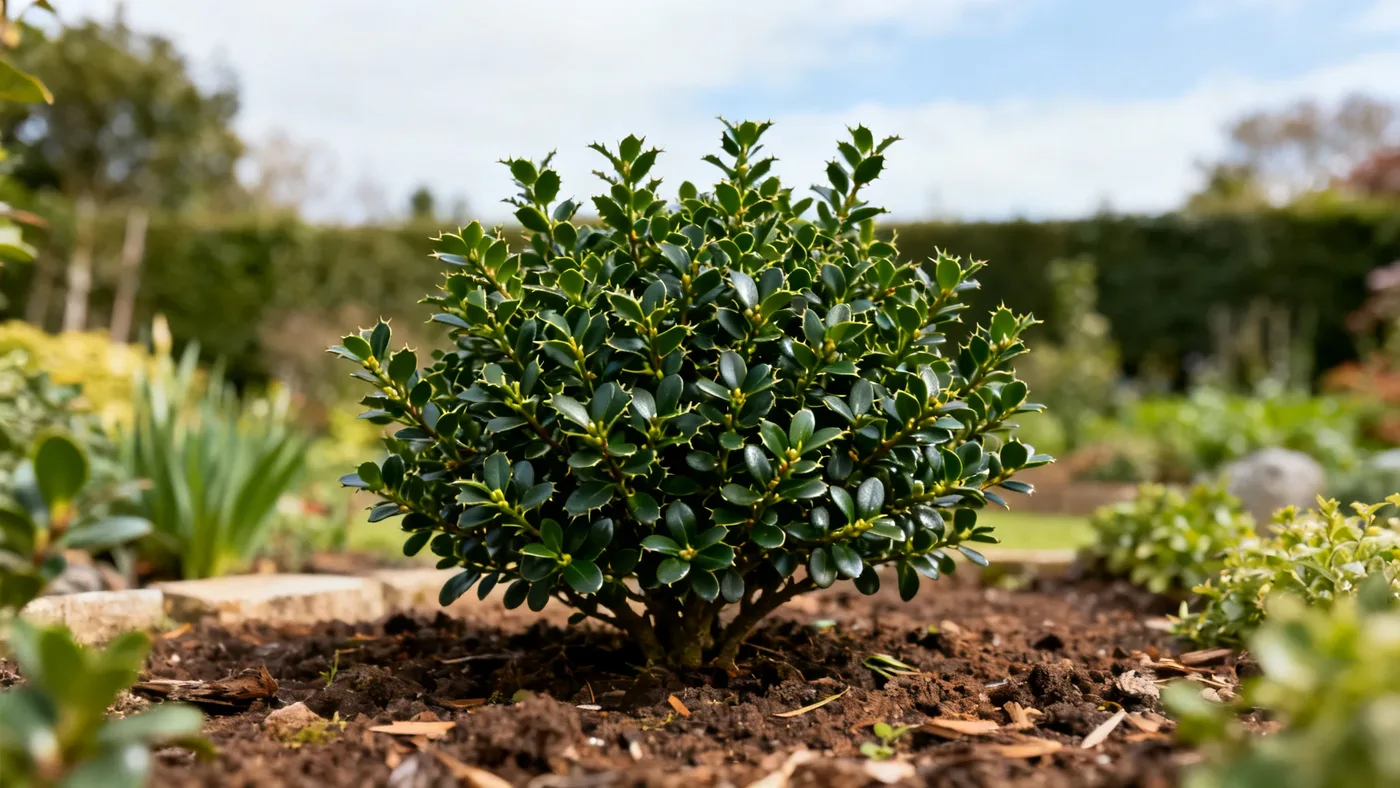
Winter Care Tips for Compact Japanese Holly in Cold Zones
Compact Japanese Holly (Ilex crenata 'Compacta') is hardy to USDA zones 6 through 8, though some nurseries offer selections rated to zone 5b when planted with winter wind protection. These evergreen shrubs earn their place in cold-climate gardens because they keep their dense, dark-green foliage all year. But winter in zones 6 and 5b brings real stressors: drying winds, temperature swings, heavy wet snow, and deicing salt spray. Without proper preparation, even hardy Compact Japanese Holly can show winter burn, bronzing, or leaf scorch, especially in exposed sites.
This guide walks you through practical steps to protect your Compact Japanese Holly through the coldest months and set it up for vigorous spring growth.
Materials You'll Need
Before autumn cold arrives, gather these supplies:
- Shredded bark or composted wood chips for mulching (3 to 4 cubic yards per plant, depending on plant size)
- Burlap fabric or commercial plant wrap (optional, for severe-exposure sites)
- Garden stakes or bamboo poles
- Twine or soft plant ties
- Watering can or soaker hose
- Pruning shears or hedge shears
- Granular balanced or acid-forming fertilizer (optional, for early spring application)
Step-by-Step Winter Protection
Step 1: Complete Autumn Pruning Before Frost (Late October to Early November)
Prune your Compact Japanese Holly before winter dormancy sets in. Do this shearing work in late autumn, while the plant is still entering dormancy but before hard frost locks in the new growth.
Shear lightly to shape the plant or remove crossing branches, keeping cuts minimal. Never remove more than one-third of the foliage in a single season. Because Compact Japanese Holly grows slowly (roughly 3 to 6 inches per year), overpruning now steals next year's density.
Winter pruning is tempting but risky. Cuts made during harsh weather create open wounds that cold air invades; a late-winter shearing (late February through March) is better if you missed autumn. Spring pruning ensures the plant has all winter to seal and compartmentalize wounds.
Step 2: Establish Consistent Soil Moisture (Early November)
This is critical. Compact Japanese Holly does not tolerate completely dry soil, and it absolutely rejects soggy, waterlogged roots. Winter moisture stress comes from two angles: a plant that enters winter thirsty will suffer more cold damage, and soil that stays sodden freezes solid and rots roots via Phytophthora root rot.
Water deeply before the first hard freeze. Soak the root zone thoroughly, then let it settle. Check soil texture 2 to 3 inches below the surface; it should feel like a wrung-out sponge, not dust or mud.
During winter thaws (particularly in mild zone 6 to 8 regions where temperatures fluctuate), check soil moisture monthly. If the top few inches are bone-dry and the plant is in a rain or snow shadow, water gently before re-freezing. A soaker hose applied on a warm day works better than overhead watering, which can ice over and damage foliage.
Step 3: Apply Mulch Layer (Late November, After Frost)
Spread 2 to 3 inches of shredded bark or composted wood chips in a ring around the plant, starting 3 to 4 inches away from the stem and extending out to the drip line (roughly 4 to 5 feet wide on a mature specimen). Do not pile mulch against the trunk; that invites rodent damage and fungal canker.
Mulch moderates soil temperature swings and keeps roots insulated from repeated freeze-thaw cycles that heave plants and snap root hairs. It also suppresses winter annual weeds.
Do not use fresh wood chips or pine bark directly touching the stem. Use aged or composted material that has already begun breaking down.
Step 4: Shield from Winter Wind (Optional, for Exposed Sites)
If your Compact Japanese Holly sits in a windy, open spot, winter burn (bronzing or yellowing of leaves) is a real risk in zones 5b and 6. The plant loses moisture through its leaves faster than frozen roots can replace it.
For shrubs in high-wind areas, wrap the plant loosely in burlap from late November to March. Secure burlap to stakes on the windward side without cinching the fabric too tight; air still needs to flow around the foliage. Never wrap the plant in plastic; that traps moisture and invites mold.
A simpler option is to plant Compact Japanese Holly on the sheltered side of a fence, garage, or taller evergreen. Site selection prevents damage better than retrofitting protection.
Step 5: Monitor and Water During Winter Thaws (January Through February)
In zone 6 to 8 regions, January and February bring mild spells where snow melts and rain falls. Check your Compact Japanese Holly's soil moisture on these warmer days. If the ground is not frozen and soil is dry 2 inches down, water at the root zone.
This sounds counterintuitive, but warm-spell watering prevents the stress that leads to winter damage. A hydrated plant is more resilient to cold snaps that follow.
If your area sees harsh winds during thaws, these are the times to double-check burlap tie-downs or shelters. Wind damage is often most severe when soil is soft enough to let roots shift.
Step 6: Prune Out Cold-Damaged Growth (Late March to April)
After the last hard freeze, but before the plant flushes new spring growth, inspect your Compact Japanese Holly for winter damage. Look for:
- Foliage that remains bronzed or yellowed (not just the normal seasonal darkening)
- Brittle twigs that snap easily
- Sunken cankers or split bark
Prune out obviously dead wood back to healthy tissue. Make cuts at a 45-degree angle, 1/4 inch above an outward-facing bud. Do not seal cuts; the plant compartmentalizes on its own.
If dieback is severe (more than one-third of the plant), spread pruning over two years to avoid shocking the plant further. One light shearing per year is better than one heavy cut.
Tips for Success
- Choose the right site. Afternoon shade (3 to 4 hours of filtered sun) reduces winter-burn risk in zone 5b and northern zone 6. Full sun to light shade is ideal for density; avoid deep shade year-round.
- Verify soil drainage before planting. Dig a test hole, fill it with water, and see if it drains within 4 to 6 hours. If water pools or drains sluggishly, amend with organic matter or choose a raised bed. Poor drainage is the fastest path to disease.
- Match zone expectations. Zone 6 Compact Japanese Holly typically needs wind protection only in exposed sites. Zone 5b selections are hardier but still benefit from shelter. Check your nursery label; the cultivar matters.
- Water in autumn, too. Many cold-zone gardeners stop watering in September, assuming fall rains handle it. But if autumn is dry, water weekly through October to send the plant into winter well-hydrated.
- Avoid high-nitrogen fall feeding. Do not fertilize after August. Late feeding pushes tender new growth that frost kills and creates winter stress. Save fertilizing for early spring (April) when the plant resumes active growth.
Common Mistakes to Avoid
- Overwatering or planting in poor drainage. Compact Japanese Holly is evergreen, but it is still dormant in winter. Waterlogged soil rots roots before frost even arrives. This is the leading cause of dieback.
- Wrapping in plastic. Plastic wrap traps heat and humidity, promoting mold and canker. Burlap only.
- Heavy winter pruning. Wounds opened in December or January do not heal well. Prune in autumn or wait until late winter.
- Deicing salt spray. If your plant sits near a road or driveway treated with salt, the foliage edge can scorch. Rinse foliage gently with fresh water on warm days after salt exposure.
- Forgetting to mulch existing plants. Mature plants still benefit from a fresh mulch layer each November; old mulch compacts over time.
Expected Results
With proper winter care, your Compact Japanese Holly should retain its dark-green color through winter, with only minor bronzing in very cold or exposed microclimates (this is normal for zone-edge plants). The plant should emerge in spring ready to flush new growth by April or May, and show no signs of winter dieback, canker, or root disease if soil drainage was adequate. You can expect steady growth at its natural slow pace of 3 to 6 inches per year in height.
Plants that are neglected, especially those planted in poor drainage or exposed to severe wind without shelter, may show winter burn, twig dieback, or root rot symptoms. Recovering from severe winter damage takes a full growing season or more, so prevention is far more efficient than damage recovery.
For a complete guide to year-round care, see the Compact Japanese Holly Care Guide.
Quick Reference: Winter Care Checklist
| Task | Timing | Details |
|---|---|---|
| Prune | Late Oct.–Nov. | Light shearing; remove no more than 1/3; avoid winter pruning |
| Water thoroughly | Early Nov. | Ensure soil is moist (like a wrung-out sponge) before frost locks in |
| Apply mulch | Late Nov., after frost | 2–3 inches shredded bark; start 3–4 inches from stem; extend to drip line (4–5 ft) |
| Wrap (if exposed) | Late Nov.–Mar. | Burlap only, loose fit, on windy sites in zones 5b and 6 |
| Check soil moisture | Jan.–Feb. (thaw days) | Water if top 2 inches are dry and ground is not frozen |
| Inspect and prune dead wood | Late Mar.–Apr. | Remove obviously dead growth; leave minor bronzing (normal) |
| Resume fertilizing | April (early spring) | Use balanced or acid-forming fertilizer only; avoid fall feeding |