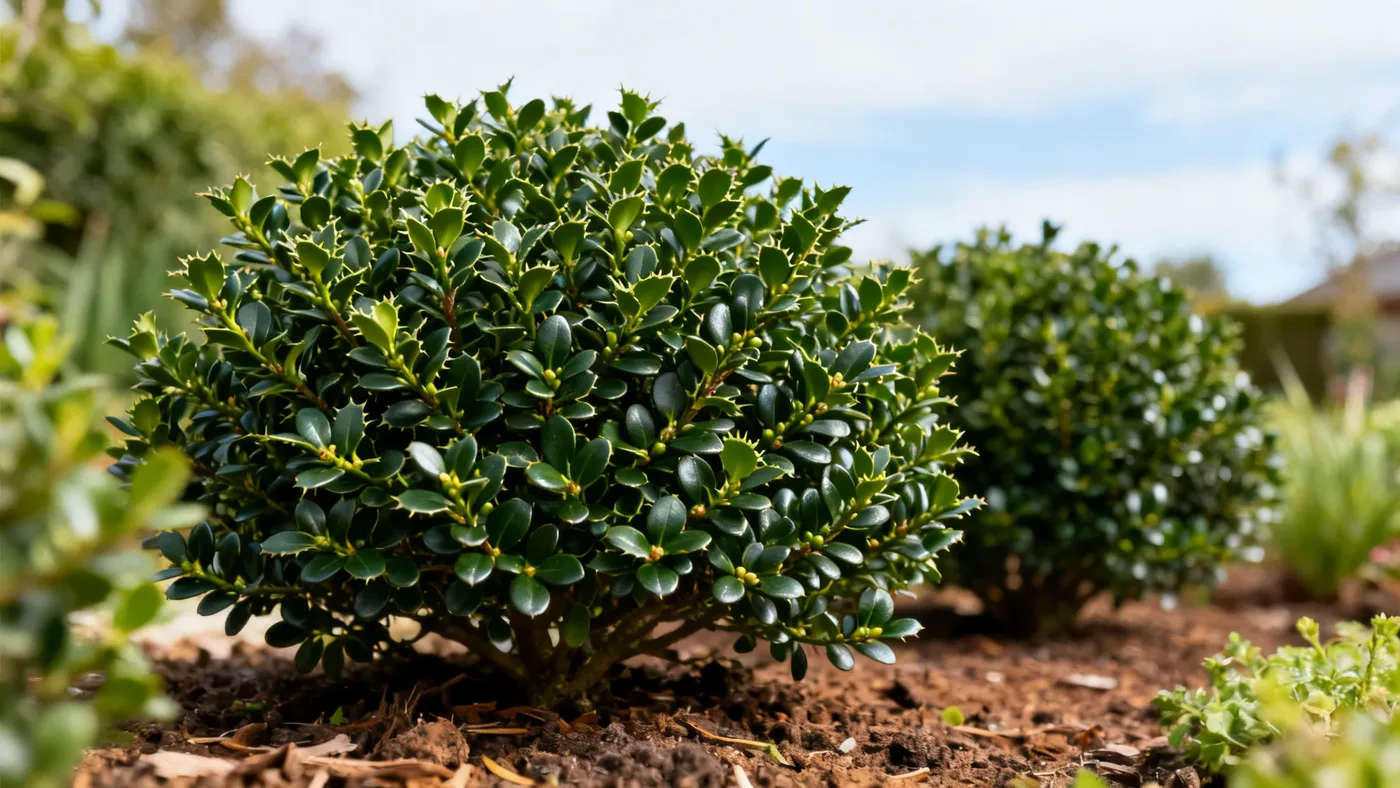
Compact Japanese Holly Care Guide: Everything You Need to Know
Key Takeaways
- Compact Japanese Holly thrives in USDA zones 6-8 and reaches 3-4 feet tall at maturity
- Plant in spring or early fall in well-drained, acidic soil (pH 5.0-6.5)
- Requires moderate, consistent moisture; does not tolerate wet or completely dry soil
- Prune in late winter to early spring; responds well to shearing and heavy renewal
- Space plants 3-4 feet apart for hedges or 4-5 feet for specimen plantings
Understanding Compact Japanese Holly
Compact Japanese Holly (Ilex crenata 'Compacta') is an evergreen shrub that has become a favorite among gardeners and landscapers seeking a refined, low-maintenance plant. Native to Japan, Korea, and eastern China, this cultivated selection brings dense, glossy foliage and formal appeal to any landscape. The plant's small, oval leaves with finely toothed margins closely resemble boxwood, making it an excellent alternative, particularly for those concerned about boxwood blight.
At maturity, Compact Japanese Holly reaches 3 to 4 feet tall and 4 to 5 feet wide, though specimens left unsheared over many years can reach 5 feet in height. Its growth rate is slow, typically 3 to 6 inches per year, which means it requires less frequent reshaping than faster-growing shrubs. This makes the plant ideal for formal hedges, foundation plantings, topiary, and mass plantings in residential and commercial landscapes.
Site Selection and Planting Location
Successful Compact Japanese Holly care begins with choosing the right location. The plant performs best in full sun to part shade, with the densest, most attractive foliage developing in full sun to light shade. If you live in a region with hot summers, light afternoon shade can help protect foliage from scorching, particularly in stressed plants.
Wind exposure matters more than many gardeners realize. In harsh, windy sites, foliage may bronze or yellow slightly during cold winters. If you are planting in an exposed location, consider a windbreak or sheltered position to minimize winter stress. Compact Japanese Holly shows good to high deer resistance, making it valuable in areas where browsing is a concern.
Space plants carefully based on your intended use. For a continuous low hedge, plant 3 to 4 feet apart. For specimen plantings or foundation use, allow 4 to 5 feet between plants. Proper spacing ensures good air circulation and reduces disease pressure later.
Soil Preparation and Planting Steps
Compact Japanese Holly demands well-drained, acidic soil to thrive. Soil pH should range from 5.0 to 6.5. The plant performs best in humus-rich loam but will tolerate clay soils if drainage is adequate. Poor drainage is the leading cause of decline; wet, soggy soil invites Phytophthora root rot and black root rot, both of which can kill the plant.
Before planting, amend heavy clay soil with compost or peat moss to improve drainage. Work these amendments 8 to 12 inches deep. If your soil is naturally alkaline, adding sulfur will lower the pH toward the preferred acidic range. A soil test from your local extension service will confirm your starting pH and guide amendment rates.
Plant in spring or early fall, ahead of frost. Dig a hole roughly as deep as the root ball and twice as wide. Set the plant so the top of the root ball is level with the soil surface; planting too deep invites root issues. Backfill with amended soil, firm gently, and water thoroughly. Apply 2 to 3 inches of mulch around the base, keeping it 2 inches away from the stem to prevent rot.
Watering and Moisture Management
Watering is where many gardeners misstep with Compact Japanese Holly. The plant requires moderate, consistent moisture, particularly during the first growing season. Regular water is essential until the plant is established, typically within the first year. After establishment, maintain moderate, consistent moisture; the plant does not like to dry out completely, nor does it tolerate waterlogged soil.
Water when the top inch of soil feels dry to the touch. During hot, dry spells, this may mean watering deeply once or twice weekly. In spring and fall, when temperatures are moderate, reduce frequency. Check soil moisture regularly, especially container-grown plants, which dry faster than in-ground specimens.
Drought tolerance is moderate once the plant is established. A 2 to 3-inch mulch layer helps retain soil moisture and moderates soil temperature, reducing watering frequency. Avoid splashing foliage when you water; this reduces fungal disease pressure on the leaves.
Light and Sun Requirements
Full sun to part shade produces the best results for Compact Japanese Holly. In full sun, the plant develops maximum density and maintains its dark green color year-round. In part shade, growth remains compact and foliage stays attractive, though the plant may be slightly less dense than in full sun.
If you are planting in a location that receives less than 4 to 6 hours of direct sun, growth will slow further and foliage density may diminish. While the plant tolerates lower light, it is not ideal for deep shade. In regions with intense afternoon heat, light shade in the hottest part of the day provides protection without compromising the plant's appearance.
Pruning and Formal Shaping
Pruning is a cornerstone of Compact Japanese Holly care, especially if you are growing it as a formal hedge or topiary. The plant responds exceptionally well to shearing and hand-pruning alike. Prune in late winter to early spring, before new growth flushes. This timing minimizes stress and allows the plant to fill in quickly during the growing season.
For formal hedges, use hedge shears or a powered hedge trimmer to maintain a uniform shape. Prune to the desired height and width, removing no more than one-third of the shoot length at a time. A light, second shearing in early summer will maintain a neat appearance through autumn. Remove any dead wood or crossing branches to maintain plant health.
If a plant becomes leggy or overgrown, Compact Japanese Holly tolerates heavy renewal pruning exceptionally well. You can cut the plant back to 6 to 12 inches above the ground in late winter; it will regrow densely if the root system is healthy and soil moisture is maintained. This resilience makes the plant forgiving for gardeners who neglect pruning for a season or two.
Fertilizing and Soil Chemistry
Light annual feeding supports vigor without pushing excessive soft growth that is prone to pest damage. In early spring, apply a balanced fertilizer or an acid-forming fertilizer formulated for hollies or azaleas. Follow the label rate based on your plant's size.
Over-fertilizing is a common mistake. High nitrogen encourages tender new foliage attractive to spider mites and other pests. A single annual application in spring is sufficient for most established plants. If leaves yellow between the veins while veins remain green, the plant likely has chlorosis from alkaline soil; this requires sulfur application to lower soil pH.
Mulch acts as a slow-release nutrient source as it breaks down. Replenish mulch annually to maintain a 2 to 3-inch layer, keeping it pulled back from the stem. This practice supports both moisture retention and gradual nutrient cycling.
Managing Pests and Diseases
Compact Japanese Holly faces three main pest challenges: spider mites, scale insects (especially black scale), and leafminer. Spider mites thrive in hot, dry conditions and create fine webbing on leaf undersides, causing bronzing. Spray with neem oil or insecticidal soap in early morning or late evening. Scale insects appear as small, hard bumps on stems and leaves; prune out heavily infested branches and treat remaining foliage with horticultural oil in dormant season. Leafminer larvae create tan, winding trails in leaves; remove affected leaves and dispose of them (not in mulch).
Disease pressure increases in poorly drained soil. Phytophthora root rot causes sudden wilting and root decay; the only remedy is improved drainage or replanting in a raised bed with fresh, well-draining soil. Black root rot causes similar symptoms and is difficult to reverse. Canker, a stress-related disease on weakened plants, appears as sunken lesions on stems; prune out affected branches and improve growing conditions.
Prevent disease by maintaining well-drained soil, avoiding overhead watering, and ensuring good air circulation around plants. Remove fallen leaves from the base of the plant during cleanup to reduce fungal spore load.
Seasonal Care Calendar
| Season | Care Tasks |
|---|---|
| Early Spring | Apply annual fertilizer. Begin pruning before new growth flushes. Check soil moisture and water if dry. |
| Late Spring | Monitor for spider mites and scale. Plants bloom (inconspicuous white flowers). Water regularly until soil is established. |
| Summer | Maintain consistent moisture. Apply light second shearing in early summer if desired. Watch for heat stress in exposed sites. |
| Early Fall | Plant new specimens ahead of frost. Reduce watering frequency as temperatures cool. Prepare for winter winds in exposed areas. |
| Late Fall and Winter | Monitor for winter burn in windy, cold sites. Avoid heavy pruning. Water only during dry spells. Mulch remains in place year-round. |
Quick Reference Checklist
At Planting
- Choose a location with full sun to part shade
- Space plants 3-4 feet apart for hedges; 4-5 feet for specimens
- Amend soil with compost to ensure drainage; target pH 5.0-6.5
- Plant in spring or early fall
- Water thoroughly after planting; apply 2-3 inches of mulch
Annual Maintenance
- Apply balanced or acid-forming fertilizer in early spring
- Prune in late winter to early spring before growth flushes
- Maintain consistent soil moisture; water when top inch feels dry
- Inspect for spider mites, scale, and leafminer monthly during growing season
- Replenish mulch to maintain 2-3 inches
Signs of Stress
- Yellow leaves between veins: likely alkaline soil (apply sulfur)
- Wilting despite moist soil: check for root rot, improve drainage
- Bronzed foliage in summer: likely spider mites or heat stress
- Sparse, leggy growth: increase light or reset with heavy pruning
- Winter bronzing in exposed sites: normal; add windbreak for future seasons