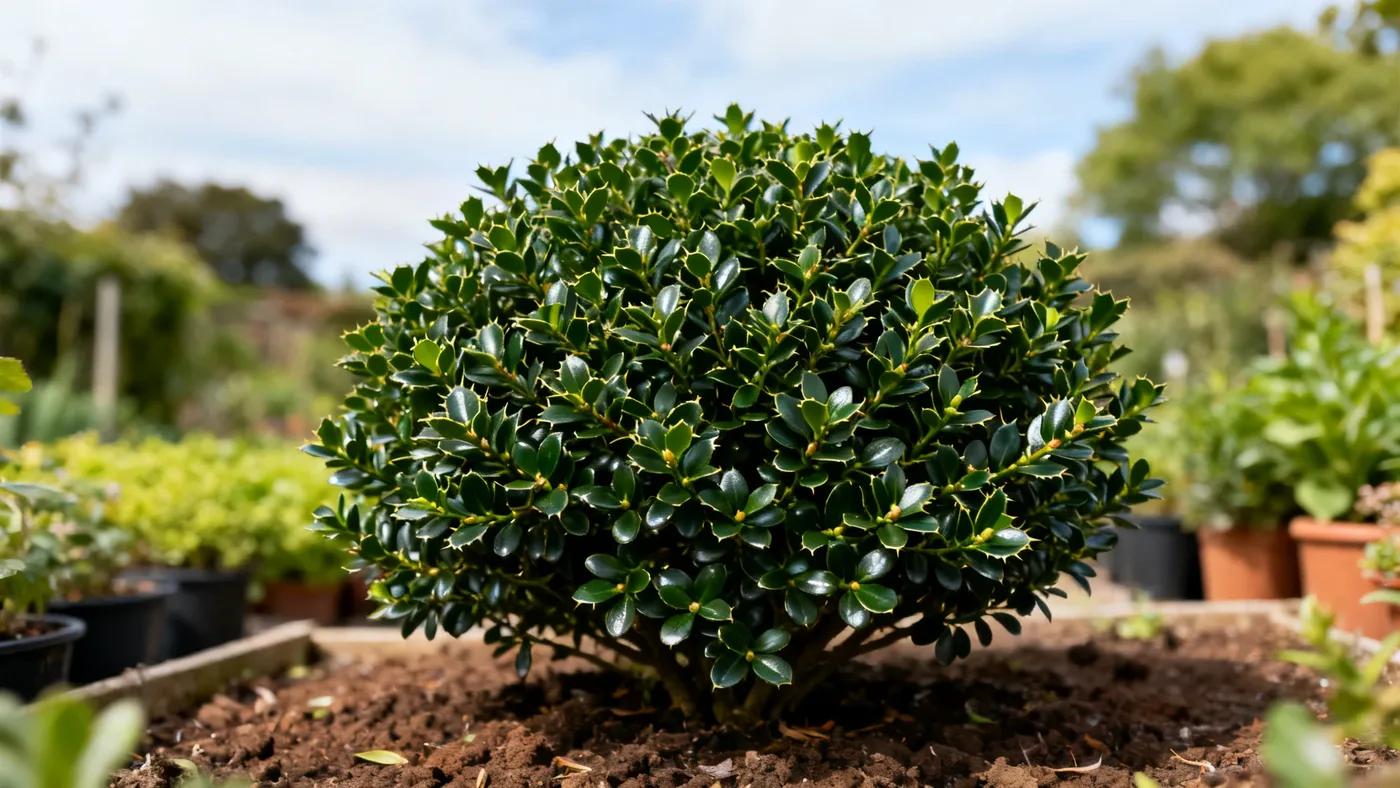
Best Soil and Drainage for Compact Japanese Holly
Compact Japanese Holly thrives in soil that holds moderate moisture without becoming waterlogged. Getting the foundation right at planting time saves years of struggle with yellowing foliage and weak growth. This guide walks you through testing your soil, amending it, and installing drainage where needed so your holly establishes quickly and stays dense and green for decades.
Why Soil Quality Matters for Compact Japanese Holly
Compact Japanese Holly is a slow-growing shrub that typically adds 3 to 6 inches per year. That measured pace means the plant invests heavily in root development during its first season. If roots encounter compacted clay, soggy drainage, or alkaline soil, that investment fails. Foliage yellows, growth stalls, and the shrub may never catch up, even after years of care.
Well-draining soil that stays consistently moist (not dry, not soggy) matches how this evergreen evolved in Japanese and Korean forests. Mimic that, and the plant settles into a predictable rhythm. Ignore drainage or soil pH, and you will spend the next five years trying to fix what went wrong at planting.
Understanding Compact Japanese Holly's Soil Requirements
Compact Japanese Holly needs three things from its soil: acidity, drainage, and organic matter. Let's break each down.
Soil pH: The Acidic Range
The best soil for Compact Japanese Holly is acidic, with a pH between 5.0 and 6.5. This is non-negotiable. If your soil pH rises above 6.5, the foliage will yellow (a condition called chlorosis), and the plant cannot absorb iron and other nutrients no matter how much you fertilize. The yellowing worsens over time and signals root stress that weakens the whole shrub.
Compact Japanese Holly soil pH requirements align with other acid-loving plants like azaleas and rhododendrons. If those thrive in your garden, your soil is probably suitable for holly. If they struggle, you are fighting against your soil's native chemistry, and amendments will be part of every planting season.
Texture: Loam Over Clay or Sand
The ideal texture is well-drained, humus-rich loam. Loam is a balanced mix of sand, silt, and clay that holds moisture without puddling. If you have clay soil, it can work if drainage is adequate, but dense, poorly draining clay is a deal-breaker. Compact Japanese Holly does not tolerate wet or soggy soils. Roots sit in standing water for even a few days and begin to rot.
Sandy soil also presents a challenge. It drains too quickly and forces you to water more frequently, especially on young plants. Humus and organic matter slow drainage in sandy soil and act like a sponge to hold moisture between waterings.
Organic Matter: The Foundation
Work 2 to 4 inches of compost or aged bark mulch into the planting bed before setting the shrub in the ground. Organic matter improves drainage in clay, increases water-holding capacity in sand, and feeds the soil biology that helps roots establish. It also gradually lowers pH as it breaks down, which benefits your holly long-term.
Testing Your Soil Before Planting
Guessing your soil's pH and texture is tempting and almost always wrong. A soil test takes the guesswork out. Send a sample to your local cooperative extension service (search online for the program in your county or state). For under $20, you will receive a detailed report that includes pH, nutrient levels, organic matter content, and texture classification. That report is your roadmap for amendments.
If a full test is not feasible, at minimum:
- Buy a basic soil pH test kit from any garden center. Follow the kit's instructions to test soil from several spots in your planting bed. Average the results.
- Perform a texture test by hand. Take a moist handful of soil, squeeze it, and open your hand. If it holds a tight ball and is hard to crumble, you have clay-heavy soil. If it crumbles immediately and will not hold together, you have sandy soil. If it holds together loosely and breaks apart with gentle pressure, you have loam.
- Check drainage by digging a hole 12 inches deep and 4 inches wide, filling it with water, and observing how long water takes to drain. Water should drain within 4 to 6 hours. If it sits longer, your drainage needs work.
Step-by-Step Soil Amendment and Preparation
Materials You Will Need
- Compost or aged bark mulch, 2 to 4 cubic yards per 100 square feet of planting bed (adjust based on bed size)
- Elemental sulfur (if pH is above 6.5), applied per package directions for your target pH drop
- Peat moss or coconut coir (optional, to further lower pH and improve moisture retention)
- A soil acidifying fertilizer, such as a holly or azalea formulation, for spring feeding
- Coarse mulch (pine bark, aged hardwood chips), reserved for top-dressing after planting
- Landscape fabric (optional, for weed suppression during establishment)
Preparation Steps
Step 1: Clear the bed and loosen the soil. Remove any turf, weeds, or debris from the planting area. Use a garden fork or tiller to break up the top 12 inches of soil. Do not turn it into dust. Aim for loose, crumbly texture with no hard clods. Loosening helps roots penetrate and improves drainage.
Step 2: Spread organic matter. Lay 2 to 4 inches of compost or aged bark mulch over the loosened soil. This amendment will mix into the top 6 to 8 inches as you work the bed.
Step 3: Amend for pH if needed. If your test showed pH above 6.5, spread elemental sulfur according to the package rate for your target pH (typically 1 to 2 pounds per 100 square feet per 0.5 pH point drop, but follow your specific product). Sulfur takes 2 to 4 weeks to lower pH, so apply it before planting if possible. If you are planting in spring and just discovered high pH in fall, apply sulfur in fall and delay planting until spring.
Step 4: Thoroughly mix. Using a garden fork or tiller, work the organic matter and any sulfur into the top 12 inches of soil. Turn it over at least twice so the amendments are evenly distributed. This is not a quick step. Take 20 to 30 minutes per 100 square feet to do it properly.
Step 5: Check drainage and refine. Water the amended bed heavily. Watch how quickly water infiltrates. If water pools or sits for more than 6 hours, see the section below on drainage solutions before planting.
Step 6: Let it settle. Allow the amended bed to sit for at least 1 to 2 weeks before planting. This gives compost time to begin breaking down and helps the soil bond together more cohesively.
Drainage Solutions for Different Soil Types
Heavy Clay Soil
If your soil is predominantly clay and does not drain within 6 hours of heavy watering, you have two options. The first is to amend heavily. Work 4 inches of compost and 1 to 2 inches of coarse sand or perlite into the top 12 to 14 inches of soil. This bulks up organic matter and improves pore space. You may need to repeat this amendment every few years as compost breaks down.
The second option is to plant in a raised bed. Build a bed 8 to 12 inches high with landscape boards or composite edging, then fill it with a high-quality planting mix (roughly 40% compost, 30% peat moss or coconut coir, and 30% coarse sand or perlite). This guarantees drainage and gives the holly a strong start. You can always amend the surrounding native soil over time.
Compacted or Heavily Trafficked Soil
Footpaths and frequently walked areas become compacted over years. Roots cannot penetrate hard soil. If this is your planting site, loosen the soil to a depth of 14 to 16 inches with a mattock or pointed spade, then follow the standard amendment steps. Do not skip this step. Loosening is the difference between a holly that establishes or one that spends five years slowly declining.
Sandy Soil
Sandy soil drains too fast and does not retain moisture. Amend it with 3 to 4 inches of compost or peat moss worked into the top 12 inches. After planting, apply 2 to 3 inches of coarse mulch (not fine bark dust, which can seal the surface). This slows evaporation and keeps roots cooler in summer. Water more frequently during dry spells, especially the first year after planting.
Common Mistakes to Avoid
Planting in alkaline soil without amendment. Hoping the holly will adapt is wishful thinking. Chlorosis will set in within the first year, and by year three, the foliage will be pale and stunted. Test and amend before planting, or choose a different site.
Over-amending with compost. More than 4 inches of compost worked into the top soil layer can lead to soggy conditions if your native soil does not drain well. Stick to 2 to 4 inches and combine it with loosening the native soil beneath.
Using fine bark dust as a soil amendment. Fine bark dust can compact and seal the soil surface, trapping water. Use aged bark mulch or compost instead. Reserve fine dust for mulching around the base after planting, though coarse mulch is preferable.
Ignoring poor drainage and hoping for the best. Compact Japanese Holly does not bounce back from root rot. Standing water kills roots, and once damaged, they do not recover. If your drainage test shows water sitting longer than 6 hours, fix the drainage before planting.
Planting during the wrong season. Spring or early fall, ahead of frost, is the correct planting window. Planting in summer heat or late fall leaves the shrub stressed during its critical establishment period. Wait for the right season.
Expected Results and Timeline
A Compact Japanese Holly planted in properly amended, well-draining soil with the correct pH will show these signs of success:
- New growth appears within 2 to 3 weeks of planting
- Foliage stays dark green (not yellowed or bronzed) through the first growing season
- By the end of year one, the shrub is established enough to withstand moderate drought
- Year-to-year growth becomes steady at 3 to 6 inches per year
A holly planted in poor soil or compacted ground will struggle for several years, adding minimal growth and often displaying stress (yellowing, dieback, or pest problems). You can recover a struggling plant by amending around it and improving drainage, but this takes time and effort. Prevention through proper soil preparation is far easier.
Quick Reference: Soil and Drainage Checklist
| Task | Target/Timing | Notes |
|---|---|---|
| Soil pH test | 5.0 to 6.5 (acidic) | Do this before amending; use extension service or home kit |
| Organic matter amendment | 2 to 4 inches compost or aged bark | Work into top 12 inches of soil |
| Elemental sulfur (if pH above 6.5) | Apply per package; allow 2 to 4 weeks to take effect | Apply in fall or 4 weeks before spring planting |
| Loosen native soil | 12 to 14 inches deep, throughout bed | Break up any hard clods; essential for root penetration |
| Drainage check | Water drains within 4 to 6 hours | If slower, build a raised bed or amend heavily with compost |
| Settle time | 1 to 2 weeks after amendment | Allows compost to begin breaking down |
| Planting date | Spring or early fall, ahead of frost | Avoid summer heat and late-fall planting |
| Mulch after planting | 2 to 3 inches coarse mulch (not fine dust) | Keep mulch 2 inches from stem; refresh annually |
| First-year watering | Moderate, consistent moisture | Do not let soil dry out completely; water during dry spells |
| Established watering | Regular moisture, moderate frequency | Once established, moderate drought tolerance develops |
Next Steps
Once your Compact Japanese Holly is in the ground with proper soil drainage and pH, focus shifts to ongoing care. Learn more about year-round maintenance in our comprehensive care guide. If deer pressure is a concern in your area, you will be pleased to know that Compact Japanese Holly earns high marks for deer resistance.