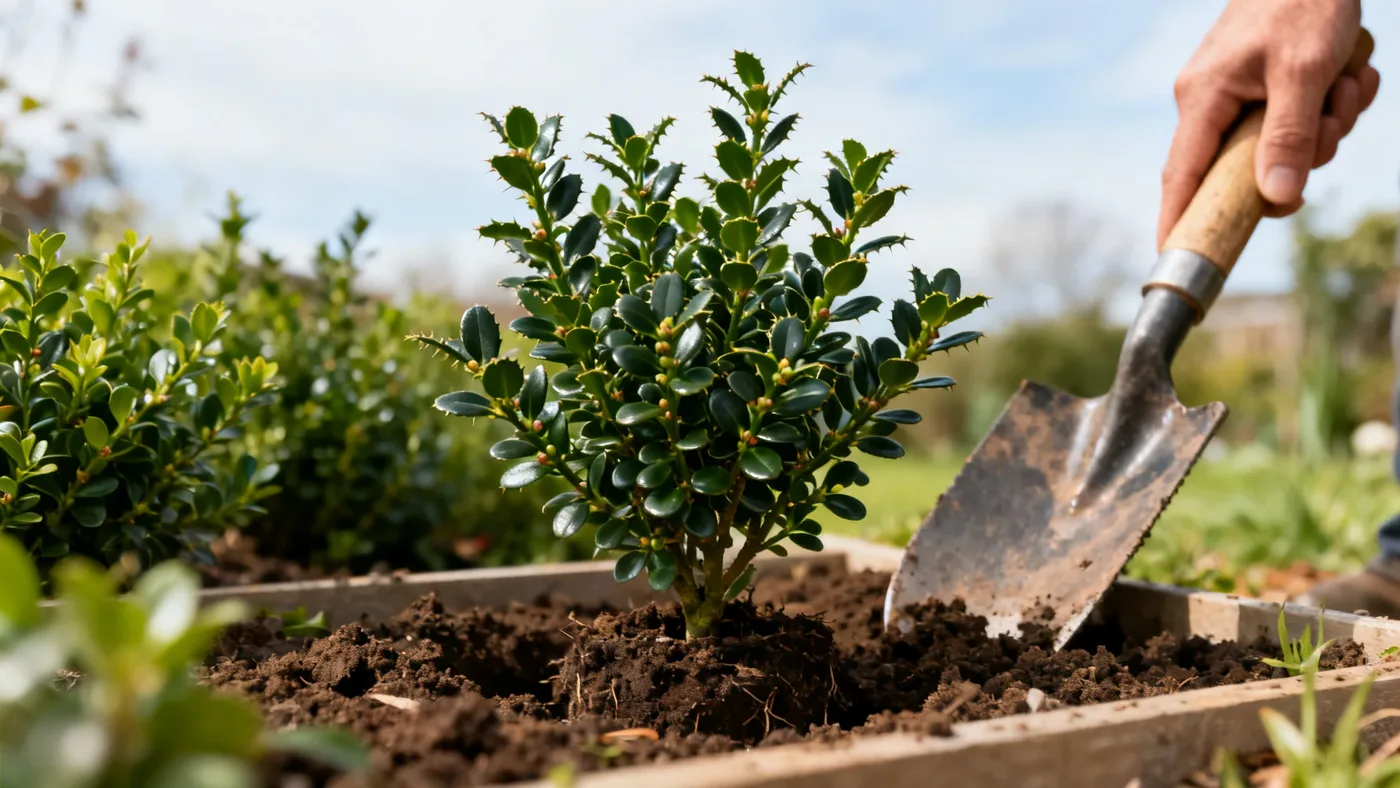
How to Plant Compact Japanese Holly the Right Way
Compact Japanese Holly (Ilex crenata 'Compacta') makes an excellent choice for hedges, foundation plantings, and formal landscape work. Its small, glossy leaves and dense branching, especially when planted at the right depth and spacing, give you the structure and definition that boxwood once promised. The catch is getting the first season right. Plant this holly correctly, and you'll have a shrub that grows reliably for decades with minimal fussing. Get the basics wrong, and you risk slow establishment or worse.
This guide walks you through every step of planting Compact Japanese Holly so it settles into your garden with confidence. We'll cover site selection, spacing, soil amendment, and the care that matters most in those first weeks after planting.
Before You Plant: Site and Timing
Check Your Hardiness Zone
Compact Japanese Holly thrives in USDA zones 6 through 8. If you're near the edge of zone 6, choose a site with afternoon shade and some wind protection to reduce winter burn. Some nurseries list 5b as possible with shelter, but expect foliage bronzing or dieback in exposed locations. If you live outside zones 6-8, this cultivar is not a good fit for your climate.
Pick Your Planting Season
Plant Compact Japanese Holly in spring or early fall, ahead of frost. Spring planting (April through May in most zones) gives the shrub the longest growing season to establish roots. Early fall planting (August through September) works well in zones 7-8 where fall growth continues longer; aim to plant at least 6 weeks before hard frost so roots have time to anchor before winter.
Avoid planting in summer or late fall. Hot soil and air in July and August stress the plant during its delicate transplant recovery. Late-season planting (after October) leaves too little time for root establishment before cold soil stops growth.
Select the Right Location
Compact Japanese Holly prefers full sun to light shade. Best density and branching happen in full sun or morning sun with afternoon shade. The shrub tolerates part shade but will thin out in heavily shaded sites.
Look for sites with good air movement but not constant wind tunneling. Wind protection matters more in zone 6 than farther south. Morning sun helps dry dew from foliage, reducing disease pressure.
What You'll Need
- Compact Japanese Holly shrub from a nursery (quart to #3 container are standard sizes)
- Shovel or spade
- Measuring tape
- Soil amendment: peat moss, composted bark, or compost (acidic sources preferred)
- Balanced or acid-forming fertilizer (holly or azalea formula)
- Mulch (aged wood chips or shredded bark, 2-3 inches deep)
- Soaker hose or drip line (for consistent watering setup)
- Watering can or hose
Step-by-Step Planting Instructions
Step 1: Prepare the Planting Hole
Dig a hole about as deep as the root ball and 1.5 to 2 times its width. The width matters more than depth. A wide, shallow hole encourages roots to spread outward into surrounding soil, which strengthens the plant's establishment far more than a narrow, deep hole.
Loosen the soil at the bottom and sides of the hole with your shovel. Compacted soil is the enemy of root penetration. If your soil is clay or compacted, loosen it down at least 12 inches to give roots a head start.
Step 2: Amend the Backfill
Compact Japanese Holly grows best in well-drained, humus-rich, acidic soil (pH 5.0-6.5). Most home gardens need amendment.
Mix the soil you removed from the hole with about 30 percent peat moss, composted bark, or compost by volume. This amendment opens clay soil, boosts water retention in sandy soil, and lowers pH toward the acidic range the plant prefers. If you live in alkaline country, a soil test is worth the cost, you can't easily fix soil that's too alkaline without ongoing amendment.
Spread some of this amended backfill in the bottom of the hole, creating a small mound to set the root ball on.
Step 3: Remove the Plant from Its Container
Water your Compact Japanese Holly well an hour or two before planting. Gently slide it out of the pot or cut the pot away if roots are wound tightly.
Loosen the root ball by hand, teasing apart any circled roots with your fingers. If roots are severely bound, make 2 to 3 shallow cuts down the sides of the root ball with a knife. This roughing sounds harsh, but it prevents the plant from staying root-bound and failing to establish in open soil.
Step 4: Set the Plant at the Right Depth
Place the root ball in the hole so the top of it is level with the surrounding soil. The soil line on the stem should be at grade, neither buried deeper nor left proud.
Planting too deep is the single most common mistake. It buries the flare of the base, restricts air to the root collar, and invites root and crown rot. Planting too shallow leaves roots exposed and stressed. Level is the goal.
Step 5: Backfill and Firm the Soil
Fill the hole halfway with amended backfill, then water it in gently. This settles the soil and removes large air pockets.
Finish filling the hole with the remaining amended backfill, firming gently as you go. You want the soil snug enough to hold the plant upright but not so compacted that water can't penetrate. Your heel pressure should be enough.
Do not tamp the soil hard. Heavy compaction defeats the root-friendly loosening you just did.
Step 6: Create a Watering Basin
Form a low berm of soil around the planting hole, about 2 to 3 inches high, extending out to the drip line (the widest reach of the branches). This basin catches water and holds it long enough to soak in, rather than running off into the lawn.
Step 7: Water Deeply
Fill the basin once or twice to ensure water soaks to the full depth of the root ball. Water should penetrate down 8 to 10 inches. Feel the soil with your finger to confirm moisture reaches the base of the root ball. Do not puddle, soaking is not the same as flooding.
Step 8: Mulch
Spread 2 to 3 inches of aged wood chips or shredded bark over the soil around the plant, staying 3 to 4 inches back from the stem to avoid crown rot. Mulch cools the root zone, conserves moisture, and suppresses weeds. It is not a permanent fixture, refresh or replace it every 2 to 3 years as it breaks down.
Skip volcano mulching (piling mulch against the stem). It traps moisture and invites disease.
Spacing for Hedges and Foundation Plantings
The right spacing makes the difference between a dense, unified hedge and a staggered line of individual shrubs.
For a continuous, formal hedge, space plants 3 to 4 feet apart center-to-center. At this spacing, mature plants (3 to 4 feet tall and 4 to 5 feet wide) will merge into a continuous wall with regular shearing. Tighter spacing speeds the visual fill but wastes plants as they mature into overlapping masses.
For specimen plants or foundation work, use 4 to 5 feet spacing. This gives each shrub room to develop its own branching structure and allows you to appreciate the individual plant's form.
Aftercare in the First Season
Watering
Water consistently, not constantly. Compact Japanese Holly does not like to dry out completely, but it hates waterlogged soil. Aim for soil that stays evenly moist (like a wrung-out sponge) for the first 6 weeks.
After that, reduce frequency but deepen each watering. Established plants need regular moisture, but they tolerate some drying between waterings once roots spread into surrounding soil. In most climates, weekly deep watering or 1 to 2 inches of rain per week is enough after establishment.
Use a soaker hose or drip line if you can. These deliver water to the soil without wetting foliage, which reduces disease risk. Hand watering with a wand works too, aim at the soil, not the leaves.
Fertilizing
Do not fertilize at planting time. It's tempting, but tender new roots can burn. Wait until the plant shows new growth (usually 4 to 6 weeks after planting), then apply a light feeding of balanced or acid-forming (holly or azalea-type) fertilizer at the package rate.
A single light feeding in early spring each year is all Compact Japanese Holly needs. Over-fertilizing pushes soft, tender growth that weakens the plant and increases pest pressure. Resist the urge to feed more.
Pruning in Year One
Leave pruning tools in the shed during the first season. The plant is busy establishing roots, not branching. Any pruning removes leaves and energy the plant needs for root growth.
In late winter of the second year (February or early March in most zones), you can begin light shaping to encourage branching and density.
Common Planting Mistakes to Avoid
Planting Too Deep
Every time we pull back sod or soil from a failing Compact Japanese Holly, the root collar is buried 2 to 3 inches underground. This is preventable. Set the top of the root ball level with the soil and you'll avoid root rot issues years later.
Planting in Waterlogged Soil
Compact Japanese Holly grows poorly in soggy sites. If your soil drains so slowly that water sits in the planting hole an hour after filling it, either amend heavily with coarse sand and compost to improve drainage or choose a different location. Phytophthora root rot thrives in poorly drained soil and will kill the plant.
Skipping the Soil Amendment
Planting straight into heavy clay without amendment sets the plant up for struggle. That amendment, peat moss, bark, compost, is not optional in clay soils. It opens the soil, encourages root spread, and improves pH. Budget the cost and the time.
Underwatering in Establishment
The plant's first 6 weeks are critical. Letting the soil dry out completely during this window stresses young roots. A soaker hose on a timer, checked weekly, is your insurance. After 6 to 8 weeks, you can ease off frequency.
Overcrowding
Spacing too tightly seems efficient but wastes money and creates a tangled mess. Stick to 3-4 feet for hedges and 4-5 feet for specimens. The time you save on fill-in will be lost to pruning and thinning later.
What to Expect
Compact Japanese Holly grows slowly, about 3 to 6 inches per year, so patience is part of the deal. In the first season, focus on establishment, not size. By the end of year two, you should see obvious new branching and fuller form. By year five to ten, the plant reaches mature size (3 to 4 feet tall, 4 to 5 feet wide).
For a more detailed look at long-term care and maintenance, see our care guide for Compact Japanese Holly.
Quick Reference: Planting Checklist
| Task | Timing or Measurement |
|---|---|
| Check hardiness zone | USDA zones 6-8 (5b possible with protection) |
| Choose planting season | Spring (April-May) or early fall (August-September) |
| Dig planting hole | As deep as root ball; 1.5-2 times its width |
| Loosen backfill soil | Mix 30% peat moss or compost; target pH 5.0-6.5 |
| Set root ball depth | Soil line level with surrounding grade |
| Create watering basin | 2-3 inches high, at drip line |
| Water in deeply | Soak until 8-10 inches deep |
| Mulch | 2-3 inches, 3-4 inches back from stem |
| Spacing: hedge | 3-4 feet apart, center-to-center |
| Spacing: specimen | 4-5 feet apart |
| First-season watering | Weekly or 1-2 inches per week |
| First fertilizer application | 4-6 weeks after planting (light, single application) |
| First-year pruning | None; begin shaping in late winter of year 2 |