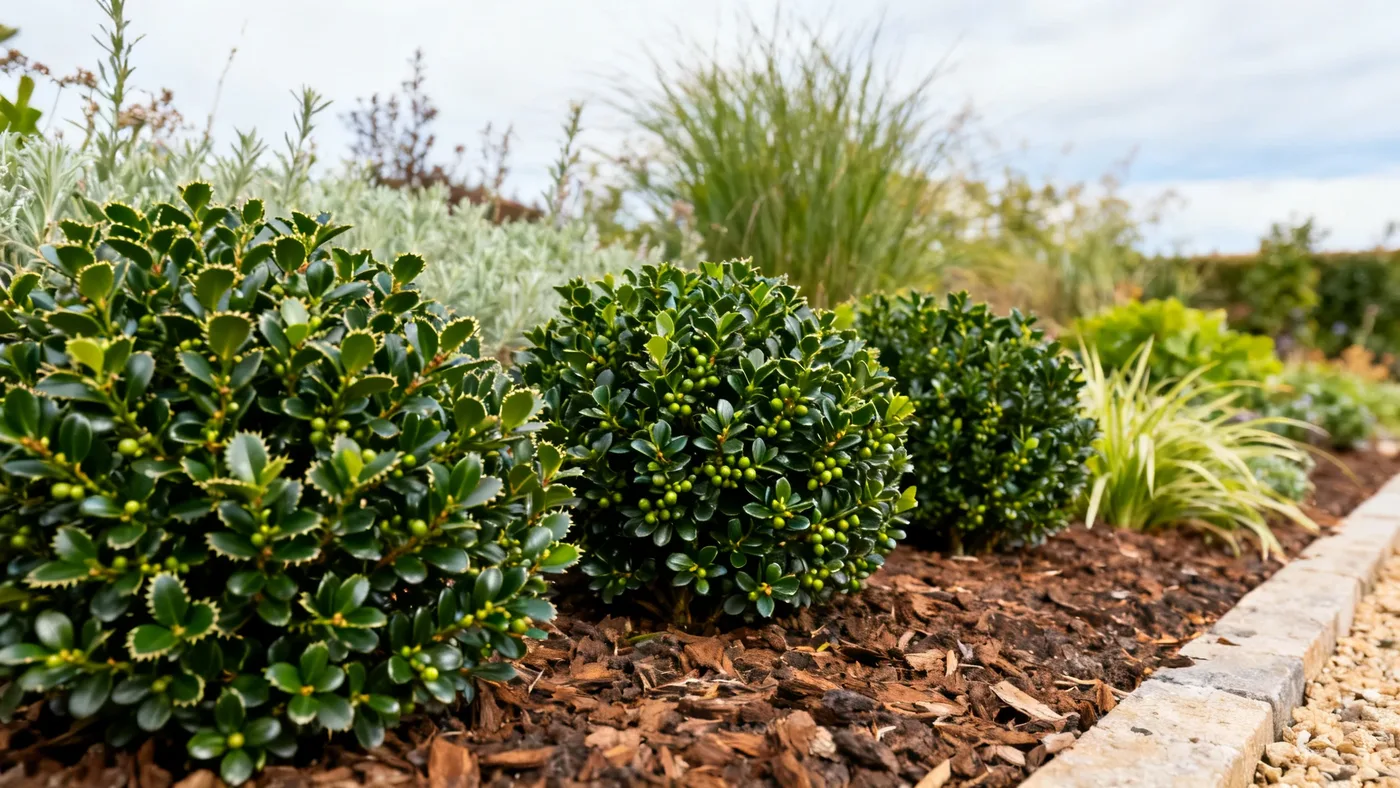
How Far Apart to Space Compact Japanese Holly for a Hedge
Building a hedge from Compact Japanese Holly (Ilex crenata 'Compacta') means getting the spacing right from the start. Plant too close and you'll waste money on stems that fight for light. Plant too far apart and you'll wait years before they grow together into a solid screen. The sweet spot for hedge spacing is 3 to 4 feet apart, and this guide walks you through exactly how to measure, plant, and manage that spacing to get a dense, professional-looking hedge.
Why Spacing Matters for Hedge Success
Compact Japanese Holly grows slowly, roughly 3 to 6 inches per year. That deliberate pace means spacing decisions made today affect your hedge for the next three to five years as the plants fill in. At 3 to 4 feet apart, your young plants will have room for air circulation (which keeps foliage disease-free), but the spacing is tight enough that they'll knit together into a continuous barrier once they mature.
Undersized plants sold in quart or #1 containers rarely touch even at 3-foot spacing. You'll see gaps for the first two or three growing seasons. That's normal. The plant spends its early years developing a sturdy root system, not pushing height. By year four or five, the stems overlap and the gaps disappear.
Before You Start: Materials and Site Prep
Gather these items before marking your hedge line:
- Measuring tape (at least 25 feet)
- String or rope
- Garden stakes or wooden dowels
- Marking chalk or spray paint (optional, for visual markers)
- Shovel or spade
- Soil amendments (peat moss, aged compost)
- Mulch (2 to 3 inches deep when done)
- Watering can or hose
- Pruners and bypass shears (for site prep only)
Choose a location that receives full sun to light shade for the densest foliage. Compact Japanese Holly tolerates part shade but produces fewer stems in heavy shade. Soil should be well-drained and acidic (pH 5.0 to 6.5). If your soil is alkaline or compacted clay, amend it with peat moss or aged compost before planting. Holly will decline in waterlogged soil, so avoid low-lying areas that stay soggy after rain.
Plan your planting for spring or early fall, ahead of the season's heavy frost. These windows give new plants time to establish roots before temperature stress hits.
Step-by-Step Spacing and Planting Instructions
Step 1: Establish Your Hedge Line
Lay out string or rope along the path where your hedge will grow. Use garden stakes to anchor the line at each end. Step back and adjust until the line is straight and aligned with your property, building, or landscape feature. A crooked line is hard to fix once plants are in the ground, so take time to get this right.
Step 2: Mark Your Planting Positions
Using your measuring tape, mark spots every 3 feet along the string if you want faster fill-in, or every 4 feet if you're willing to wait longer or have a tight budget. Place a garden stake or chalk mark at each spot. Double-check your spacing by measuring from one mark to the next. Uneven spacing shows as gaps in the finished hedge.
If your hedge line is longer than 25 feet, measure in sections and mark each spot. This prevents tape-measurement creep over long distances.
Step 3: Dig Planting Holes
At each marked position, dig a hole that is roughly as deep and twice as wide as the plant's root ball. If you're planting from a #1 container (roughly 10 to 12 inches tall and wide), your hole should be about 20 inches across and 10 inches deep. Set the excavated soil aside on a tarp.
Inspect the hole's bottom for compacted clay or hardpan. If present, loosen it with a mattock or break it up with your shovel. Compact soil prevents roots from penetrating deeper and causes waterlogging.
Step 4: Amend and Back-Fill
Mix the excavated soil with peat moss or aged compost at a ratio of 2 parts soil to 1 part amendment. Return half this amended mix to the bottom of the hole. If your native soil is very acidic (pH below 5.0), skip peat moss and use aged compost alone to avoid over-acidifying.
Step 5: Position the Plant
Remove the plant from its container by gently tipping it and sliding it out. Loosen any roots that are circling the root ball by hand, working gently. Set the plant in the hole so that the top of the root ball is level with the ground surface. Do not bury the crown (where stems meet roots). An exposed crown heals better after planting stress.
Step 6: Fill and Water Thoroughly
Fill the hole with the remaining amended soil. Firm it gently with your foot, but do not pack it hard. Water immediately and generously (1 to 2 gallons per plant, depending on hole size) to collapse air pockets and settle soil around the roots.
Wait 30 minutes, then add more water if the soil has settled noticeably. The goal is moist (not soggy) soil around the root ball.
Step 7: Mulch and Space Plants Again
Spread 2 to 3 inches of mulch (shredded bark or aged wood chips) around each plant, keeping it 2 to 3 inches away from the stem. Mulch reduces water loss, moderates soil temperature, and suppresses weeds during the critical establishment phase. Step back and verify that plants still appear evenly spaced along the line. Mulch can shift perspective, and this is your last chance to adjust if a plant looks off-center.
Watering and Establishment Care
Water deeply twice per week for the first four weeks after planting, then taper to once per week through the first growing season. Compact Japanese Holly does not tolerate drought, but it also hates standing water. Soil should feel moist (like a wrung-out sponge) at 3 inches deep, not saturated.
In fall plantings, continue moderate watering through October and into early November if rainfall is sparse. Winter dormancy reduces water need, but fall-planted hedges still need consistent moisture to root out before frost.
Managing Gaps and Fill-In
Do not prune your young hedge in its first year. Let it establish. In late winter of year two, you can make a light shearing to encourage branching, but keep it minimal (remove no more than 1 inch of growth). By year three, a second light shearing in early summer can accelerate fill-in.
By year four or five, your plants will have merged at the 3-4 foot spacing and regular annual shearing (late winter to early spring) keeps the hedge shaped and dense. Maintain a slightly wider base than top to allow light to reach lower stems and prevent dieback at the hedge bottom.
Common Mistakes to Avoid
- Planting too close: Spacing closer than 3 feet creates excessive crowding, poor air circulation, and fungal disease. It also wastes plants and money.
- Planting too deep: Burying the crown causes stem rot and slow decline. Plant with the root ball top at soil level, not below.
- Skipping soil amendment: Compact Japanese Holly prefers acidic, humus-rich soil. Planting into compacted clay or alkaline soil guarantees chlorosis (yellowing) and weak growth.
- Over-watering or under-watering: Holly needs consistent moisture, not soggy soil. Soggy soil triggers root rot; drought stress causes dieback.
- Pruning too soon: Aggressive pruning in the first two years stresses the plant and slows establishment. Patience pays off.
- Ignoring uneven spacing: Small errors in spacing compound across a long hedge and create obvious gaps or crowding later.
Hedging for Privacy and Deer Resistance
A well-spaced Compact Japanese Holly hedge at 3 to 4 feet serves double duty as a living screen and a deer-resistant boundary. Holly's small, glossy leaves and dense branching are not a preferred browse plant, so once established, your hedge rarely needs protective netting or chemical repellents.
For privacy, plan on a 4-year minimum before the hedge reaches 3 to 4 feet tall and fills in completely. If you need faster screening, space at 3 feet instead of 4, accept a higher upfront cost, and plan a shearing schedule that emphasizes height over the first two years.
Long-Term Hedge Maintenance
Once your hedge is established, refer to the complete Compact Japanese Holly care guide for pruning schedules, fertilizing, and pest management. Annual shearing in late winter keeps the hedge tight and encourages dense branching. Prune slightly lighter as you move from base to top (a slight A-shape in cross-section) so lower stems receive enough light to stay healthy.
Quick Reference: Hedge Spacing Checklist
| Task | Spacing / Measurement | Timing |
|---|---|---|
| Lay hedge line | Straight line, stakes at ends | Day 1 |
| Mark planting positions | 3 to 4 feet apart | Day 1 |
| Dig holes | Twice root ball width, same depth | Day 1 |
| Plant and water | Crown at soil level, 1-2 gallons water per plant | Day 1 |
| Mulch | 2-3 inches, 2-3 inches from stem | Day 1 |
| First-year watering | 2x per week, then 1x per week | Ongoing, season 1 |
| Year 2 light shearing | Remove no more than 1 inch growth | Late winter, year 2 |
| Expected fill-in | Gaps close, continuous hedge emerges | Year 4-5 |
| Annual maintenance shearing | Late winter to early spring, every year | Ongoing |