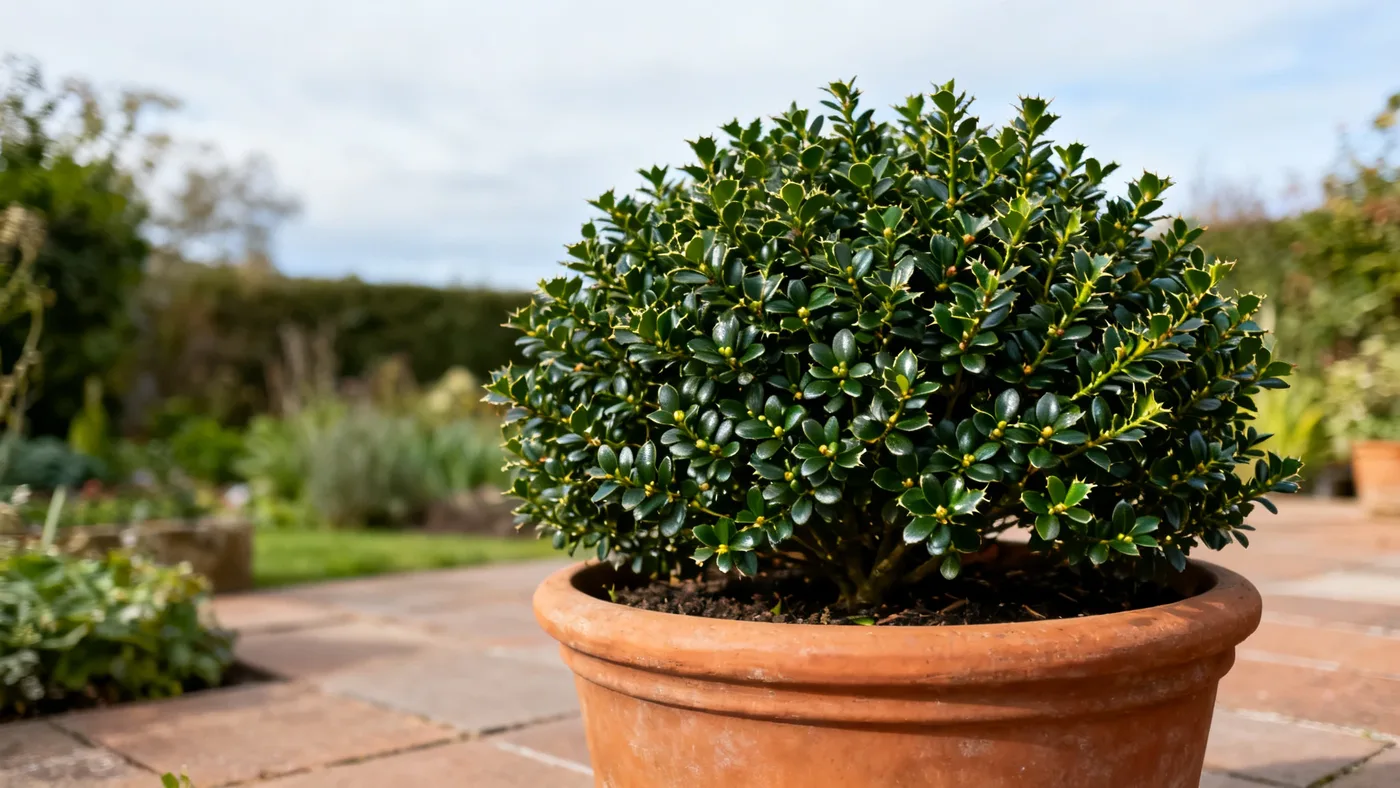
Growing Compact Japanese Holly in Pots and Containers
Compact Japanese Holly works beautifully in containers. Its slow growth, dense habit, and year-round evergreen foliage make it ideal for formal entries, patios, and small spaces where ground planting isn't an option. When grown in a pot, this plant needs consistent attention to watering, but the payoff is a sculptural, low-maintenance focal point that tolerates shearing and thickens up nicely over time.
This guide walks you through selecting the right pot, soil, and care routine to keep your container-grown Compact Japanese Holly healthy and attractive for decades.
What You'll Need
- Compact Japanese Holly plant (nursery-grown, typically sold in quart, #1, or #3 containers)
- Container with drainage holes, sized generously to give roots room to grow
- Well-drained potting soil or a mix of 50% potting soil and 50% peat moss or pine bark
- Acidifying fertilizer (holly or azalea formula) or balanced slow-release fertilizer
- Mulch (optional): aged bark or pine straw to conserve moisture at soil surface
- Pruning shears for shaping and maintenance
- Watering can or drip system
Choosing the Right Container
The pot size matters more than most gardeners realize. Too small, and the soil dries out between waterings, stressing the plant. Too large, and excess soil retains water longer than needed, risking root rot.
When selecting a pot, step up one to two sizes larger than your plant's current nursery container. This gives the roots room to expand as the plant grows at its steady pace of 3 to 6 inches per year. The pot should be deep enough to accommodate the full root ball plus another 2 to 3 inches of growing room. A rule of thumb: the pot should be at least as tall as it is wide.
Materials matter. Terracotta is attractive but dries faster than plastic or ceramic, which means more frequent watering in summer. Plastic and glazed ceramic retain moisture longer and are lighter to move. Unglazed stone and wooden containers offer a middle ground. All pots must have drainage holes; a pot without drainage will kill this plant even if you water conservatively.
Choose a container color and style that suits your space. Compact Japanese Holly works equally well in formal urns, modern slatted planters, minimalist matte-finish pots, or classic terracotta.
Soil Mix and Drainage
Compact Japanese Holly needs acidic, well-drained soil. In containers, this means you cannot simply use garden soil, which compacts and holds too much water.
Mix your own or buy a ready-made evergreen or acid-loving plant potting mix. A good recipe is 50% high-quality potting soil mixed with 50% peat moss or pine bark. This keeps the pH around 5.0 to 6.5 (acidic) while maintaining excellent drainage. If your tap water is alkaline or very hard, rainwater works better over time.
Before planting, add a 1 to 2 inch layer of gravel or broken pot pieces at the bottom of the container. This prevents soil from washing into the drainage hole and ensures water moves freely without creating a waterlogged zone at the base.
Planting Your Compact Japanese Holly
Step 1: Choose the right time. Plant in spring or early fall, ahead of frost. This gives the roots several weeks to settle in before stress from heat or cold arrives.
Step 2: Prepare the container. Fill the pot one-third full with your soil mix. Water it lightly to settle it in place and ensure soil makes good contact throughout.
Step 3: Remove the plant from its nursery pot. Gently tip the plant out of its current container. Loosen the root ball with your fingers, especially if the roots are circling the pot. Do not be aggressive; break apart the outer edge gently, just enough to encourage roots to grow outward into the new soil.
Step 4: Position the plant. Set the plant in the center of the container so the top of its root ball is level with the rim of the pot (or just slightly below). The soil surface should sit about 1 inch below the pot rim to allow room for watering without spillage.
Step 5: Fill and water. Add soil mix around the sides until the pot is full, pressing gently as you work to remove large air pockets. Water thoroughly until water drains from the bottom. This settles the soil and hydrates the roots. Water again after a few hours if the soil has settled further.
Step 6: Mulch the surface (optional). Spread a 1 inch layer of aged pine bark or shredded bark over the soil surface, keeping it 2 inches away from the stem. This helps retain moisture without creating a wet blanket against the base of the plant.
Watering and Moisture Management
Consistent moisture is the most important part of container care. Compact Japanese Holly does not like to dry out completely, but it also rots in waterlogged soil. That balance is the key.
Check your soil by hand: water when the top half-inch feels dry to your touch. In summer, that might mean daily watering. In cooler seasons or with glazed ceramic and plastic pots, it might be every two to three days. Drip irrigation or soaker hoses work better than overhead watering, since they deliver water directly to the soil without wetting the foliage, which can invite fungal issues.
As the plant grows, its water demand increases. A plant at maturity (3 to 4 feet tall and wide) uses noticeably more water than a young specimen, so adjust your schedule as it develops. Container plants in full sun need more frequent watering than those in part shade.
Feeding Your Container Plant
Container plants use up nutrients faster than in-ground plants because regular watering leaches nutrients through the soil. Compact Japanese Holly needs light feeding in early spring with an acid-forming fertilizer formulated for hollies, azaleas, or rhododendrons. Follow the label rate carefully and do not exceed it. Over-fertilizing pushes soft, tender growth that is harder to prune and more susceptible to stress.
A balanced slow-release granular fertilizer (roughly 10-10-10) applied once in early spring works well if you prefer simplicity. Alternatively, use a diluted liquid fertilizer at half strength every four to six weeks during the growing season (late spring through early summer), then stop feeding by late summer. Container plants benefit from stopping fertilizer in late summer so they can harden off before winter.
Pruning and Shaping
Compact Japanese Holly responds well to pruning and can be shaped into a formal mound, a small rounded hedge, or topiary. Prune in late winter to early spring before new growth flushes. A light shearing in early summer is also tolerated if the plant is getting too full or loose.
For a dense, rounded form, remove any leggy, crossing, or downward-facing stems and tip back the outer growth by about one-third of its length. This encourages branching and thickens the canopy. If your plant gets sparse or uneven over the years, it tolerates heavy renewal pruning, so do not hesitate to cut it back harder if needed. It will regrow from old wood.
Winter Care and Hardiness
Compact Japanese Holly is hardy in USDA zones 6 to 8. Some nurseries list 5b to 8 with winter wind protection, though performance varies by location and exposure.
In containers, the root system is more exposed to cold than in-ground plants. In the coldest part of your zone (especially zone 6), move the pot to a sheltered spot against a south-facing wall in late fall, or wrap the pot in burlap to insulate the roots. Avoid placing it where winter wind batters it continually. Water sparingly in winter but do not let the soil dry out completely, since even evergreens need some moisture during dormancy.
If foliage bronzes or yellows slightly in harsh cold or exposed sites, this is normal and temporary. The plant should return to its deep green color in spring.
Common Problems and Solutions
| Problem | Likely Cause | Fix |
|---|---|---|
| Yellowing or chlorotic leaves | Alkaline soil or pH creep from hard tap water | Repot in acidic mix; use rainwater or filtered water for waterings |
| Wilting despite moist soil | Root rot from poor drainage or waterlogging | Check drainage holes; repot if roots are soft or smell bad |
| Sparse or leggy growth | Insufficient light | Move pot to full sun or light shade; prune to encourage branching |
| Spider mites or scale insects | Stress or indoor dry air | Spray with neem oil or horticultural soap; improve air circulation |
| Foliage browning in cold or windy exposure | Winter burn or drying winds | Move to sheltered location; wrap pot in insulation in zone 6 |
Expected Results and Timeline
A young Compact Japanese Holly in a container grows about 3 to 6 inches per year. At this rate, it takes 5 to 10 years to reach its mature size of 3 to 4 feet tall and 4 to 5 feet wide. The slow growth is by design, giving you a long-lived plant that does not outgrow its pot quickly.
In its first year, expect the plant to focus on root establishment and may not grow visibly above ground. By year two, you should see new branching and a noticeably denser canopy. With consistent watering, light feeding, and occasional pruning, your container-grown plant will thicken into a sculptural focal point suitable for formal or contemporary garden settings.
For more detailed seasonal care and pruning schedules, see our Compact Japanese Holly care guide.
Quick Reference: Container Care Checklist
| Task | Timing | Notes |
|---|---|---|
| Plant | Spring or early fall | Use quart, #1, or #3 nursery plant; drainage holes essential |
| Water | When top half-inch of soil is dry | Daily checkups prevent root rot and wilting; more frequent in summer |
| Feed | Early spring | Light application of acid-forming or balanced fertilizer |
| Prune | Late winter to early spring | Light shaping; second shearing allowed early summer |
| Repot (if needed) | Every 3 to 5 years | Move up one pot size if roots fill the current container |
| Winter prep | Early November (zone 6) | Move to sheltered location; wrap pot if needed in coldest zones |